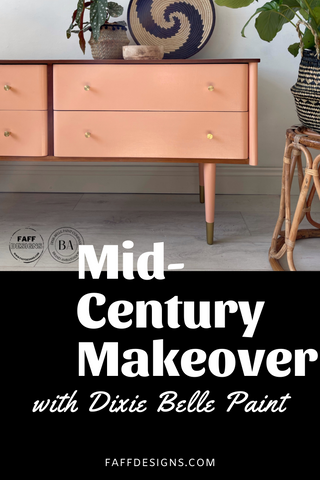
Mid Century Makeover with Dixie Belle Paint
Sometimes less is more (I don't often say that!) but in the case of mid century items then it is sometimes apt. I had a few ideas swirling around my head with this one but as it evolved it was clear it needed to stay simple and sleek.
*This blog may contain affiliate links. If you choose to purchase through the link I may earn a small amount at no extra cost to yourself. Thank you for supporting my small business.
Product list:

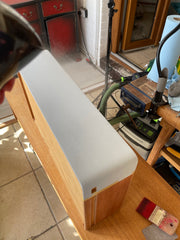
Here's the 'before' shot of the piece. This was originally a dressing table and would have had a mirror attached at some point. That was long gone and I'm not a huge fan of dressing tables anyway! The first step was to give the piece a good clean as it had been in my storage unit for a lonnnng time! I removed the handles and did two passes with White Lighting and water solution (it was very dirty!)

I filled the existing handle holes with Dixie Mud as I knew I wanted to use new handles on this piece.

There were also two small holes on the top of the piece which would have been where the upright would have supported the mirror. I filled these with Dixie Mud and sanded smooth.

As I started to sand the top down I realised the wood underneath the old varnish was in pretty good shape and had a lovely tone to it. I took the existing finish right back to bare wood as I knew I'd like to feature some of the wood in the design.


Next I added two coats of BOSS over the piece. I knew I would be using a light colour on this and this type of orange toned wood is renowned for having bleed through. BOSS is a water based product which elimates bleed through and odours. It comes in three colour options - Grey, White and Clear depending on the project you're working on. I used Grey in this instance.
Top tip! Use and old brush or a chip brush for your primers as to not ruin your decent brushes!


Between each coat of BOSS I used a sanding sponge to ensure the finish was super smooth. Remember to wipe any dust off once you've sanded with a microfibre or tack cloth.


Once the BOSS was fully dry it was time to start painting! The colour I decided on (finally!) was Apricot which is a pretty peachy pink.

To get a super smooth finish with the Apricot I misted the area very lightly with my Mister Bottle then painted the Apricot with the Scarlet brush. This brush is amazing for a super sleek finish!

Once the surface was covered in full I misted the area lightly again and used the same brush to 'lay off' the paint. I used a very light hand to pull the brush over the surface of the paint to minimise brush strokes. Top tip: lay the paint off int he same direction each time to get an even and consistent finish!

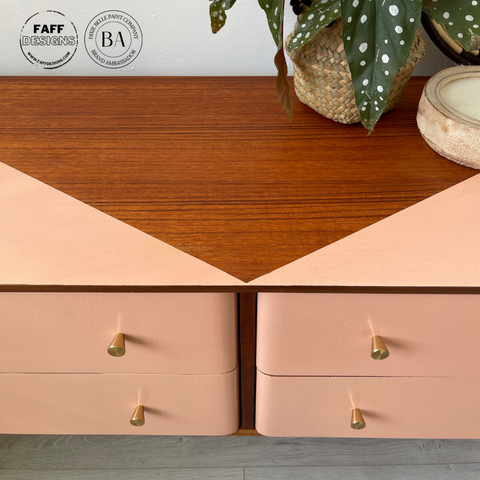
Back to the top! I had to somehow disguise or paint those pesky filled holes on the top without covering the entire thing in paint so that some of the wood would be left.


I decided on a simple taped design. I found the centre and used masking tape to create a 'V' shape on the top which would cover the holes and leave some wood showing.


To make sure the line was crisp I pressed down the masking tape with my finger and then applied a layer of Satin Clear Coat over the lip of the tape. This creates a seal and prevents the paint from bleeding under the tape.
Top tip: Paint away from the edge of the tape to prevent paint being forced underneath the edge.

I repeated the process above: 2 coats of grey BOSS then 3 coats of Apricot applied with the Scarlet brush.


Once all the paint had dried I applied my top coat. I decided on Gloss Clear Coat for this piece for a super high shine. I used the Gator Hide Sponge for thin and even layers. I applied three layers in total.

After sanding the legs back to raw wood, I realised that they were made from a different wood to the rest of the piece and would look mis-matched if I left them. So they got the paint treatment too!
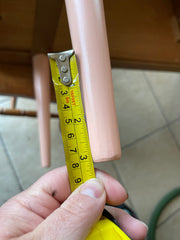

I couldn't leave them too plain though! I measured 3 inches up the leg, taped off and applied Satin Clear Coat to seal the tape edge.


Next I mixed a little Satin Clear Coat with some Gemstone Mousse in Golden Gem and painted on the tips of the legs. I sealed with an aerosol gloss lacquer for a high shine.


Finally all of the bare wood was treated with Howdy Do Hemp Oil. The drawer sides, inners and the top were dried out so it really nourished the wood and bought the warm tone out. Howdy Do Hemp Oil dries to a matte finish and works beautifully over painted finishes and bare wood.


Here's the finished piece along with some close up shots!
Hope you enjoyed reading about this cute mid century piece!
Con x


Leave a comment